*updated 2019
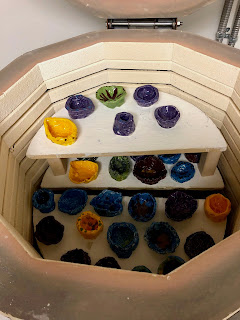 |
| Why thank you, kiln gods. |
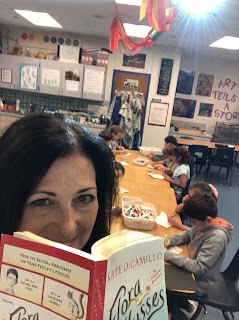 |
| Reading aloud to 3rd grade as they draw. It's the dream! |
How long does it take elementary students to create a work of art? How many licks does it take to get to the center of a Tootsie Pop? One, two three...? Not three. Let's look at my last 9 weeks (one marking period).
I teach about 640 children a week and most of my class sizes are at 28. They come to art once or twice a week. Factor in assemblies and programs, fire drills, student absences, etc...during a 9 week period, I might see the kids 8-10 times. If I'm lucky.
Students are in my room for 50 minutes, and every minute counts. We spend about 10 minutes reviewing the lesson and how to use the art materials correctly, we need 5-8 minutes for clean up. Once supplies are out and everyone is ready, kids have about 30 minutes to actually create.
At the elementary level, process tends to be more important than product. Ideally, students create a "masterpiece" that they are proud of, but it's their creation, their work of art, not a teacher copy. The process, the journey, and experimentation are so vital at this age.
Younger students work faster and tend to finish a work of art in 3-4 rotations. I will add as much to the lesson to make it robust: reading books, showing videos, mixing media. The more we can add, the better! Otherwise, we will run out of art materials by February!
I also look for weak areas. For example, our littles are really struggling with fine motor skills, so we paint and draw with regular-sized materials. We fold, cut and tear paper.
  |
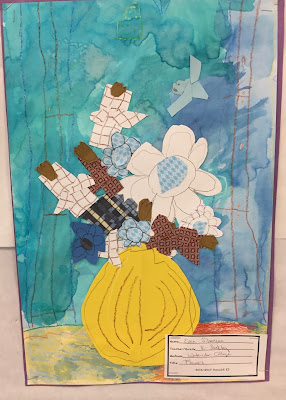
Detail of Kindergarten Flower Still-life collage. Students drew flowers and leaves using shapes.
They cut them out and glued with no assistance. It took a while, but they rocked it! |
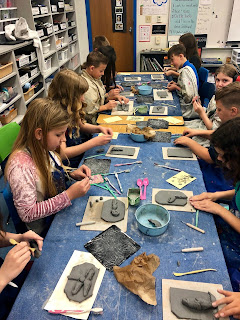 |
| Ah, clay. |
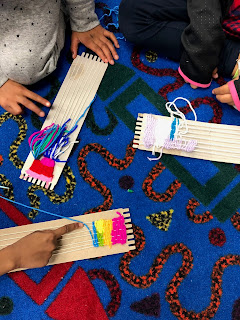 |
| Everyone loves textiles! |
 |
| Chilling, listening to Kids Bop, drawing... |
Older students work slower, have a more complex curriculum, and we focus deeply on Studio Techniques. We learn the correct way to use materials and how to care for our art supplies. We learn to think like an artist, how to see with our artist eyes. It takes time. We plan our work and work our plan. We practice techniques until we are comfortable.
Research, practice, collaboration, sketches, experimentation, all this takes time. And when you only have 30 minutes at a time...it adds up. However, this process is vital to growing creativity and expressive thinking.
With all that to consider, here's a peek at our last 9 weeks!
5th grade:
1-Point Perspective: Cubes, Cities or Cards; Watercolor Jellyfish (Math and Science integration)
We always start the year learning how to draw from a 1-point perspective. I make it a big deal: I purchase 2B, 3B, 6B, 4H and Ebony pencils, good drawing paper, and Prismacolor Scholar colored pencils. JUST for 5th grade. They feel so special using these advanced art supplies. I teach them how to care for the pencils, and you know what? They do.
1-point perspective was a struggle for me in HS. I just couldn't get it, and it frustrated and embarrassed me so much. So, I make sure the kids GET IT.
We studied the Renaissance, geometry integration, how to use rulers, how to draw lightly, all the important steps for precise drawing.
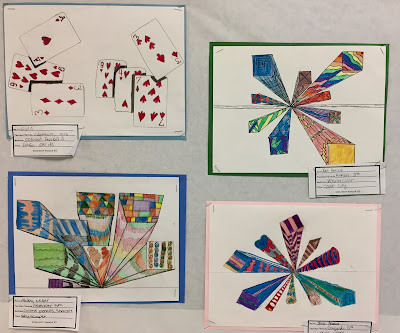 |
| "Cubes, Cities and Cards", 5th grade |
 |
| First time using Prismacolor pencils :) |
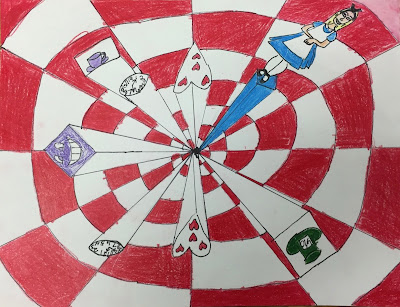 |
| The "Alice in Wonderland" version! |
Watercolor Jellyfish
What's the opposite of a highly detailed, technical, precise, geometric, time-consuming drawing?
Organic watercolor!
The kids experimented with
wet-on-wet and salt technique. Then they
drew jellyfish with glue, using expressive lines. Maybe they used white crayon for added details. Once the glue dried, we discussed the science of color:
cool colors recede, warm colors pop out. Students had a blast creating an abstract background using cool colors with wet on wet and salt.
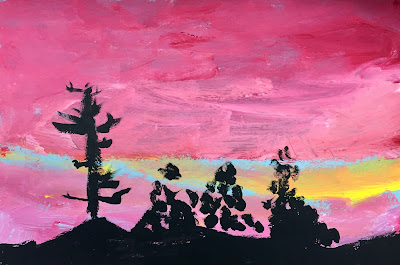
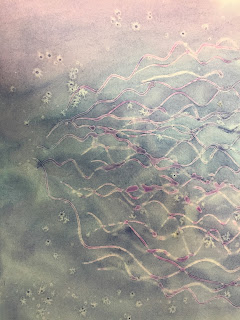 |
| Backgrounds: Gorgeous salt technique with variety of lines, 5th grade |
|
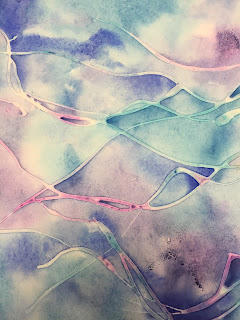 |
| Lovely wet-on-wet |
These are WIP, more to come!
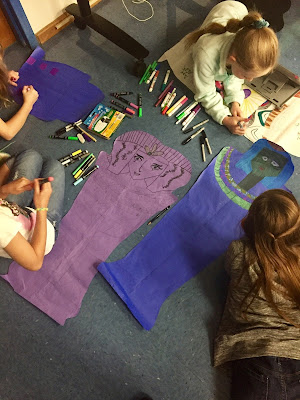
4th grade: Ancient Egyptian Mummy Coffins: focus on Art History integration, symmetry, shape, and pattern.
Students spent some time on their
Google Classroom visiting websites to prepare them for this. We viewed Ancient Egyptian works of art in various museums, we read stories about the Ancient Egyptians, we learned about modern day Egypt. After that, students
created their own Mummy Coffin, with focus on symmetry, pattern and authentic, historical details. We used large kraft paper with Crayola Gel markers. I also had some metallic crayons for details. This project was more about perseverance than anything, and these kids need it!
4th grade is currently creating Portrait Weavings (loosely...) based on the Greek myth of Arachne.
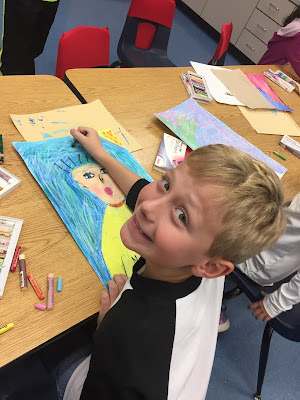
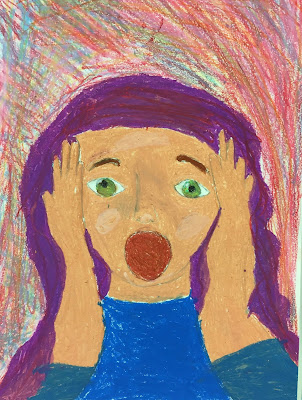
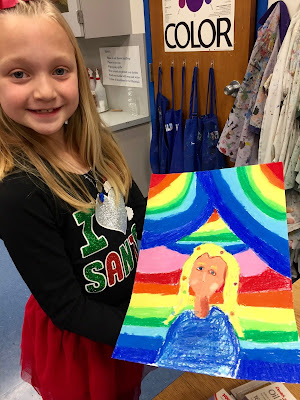
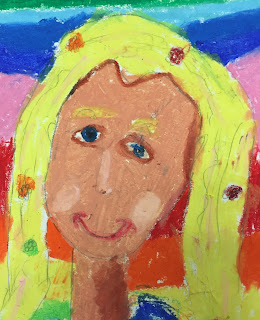
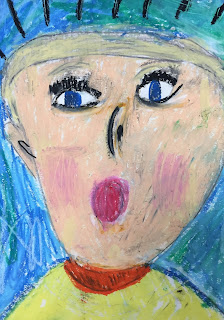
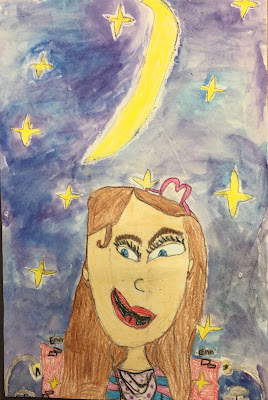
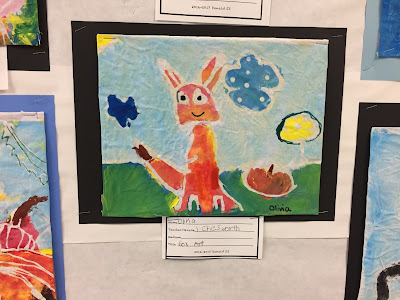
3rd grade: Self Portraits: Color can show Emotion (science integration)
Students had a crash course in color theory and color psychology. How does red affect your emotions? Could it raise your heart rate? What about pink? Why do some prisons paint their cells pink? How can blue show sadness versus tranquility?
Have you ever noticed our fast food restaurants are yellow and red? Why do you think that is? (hint...there is a reason!)
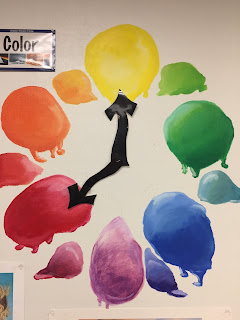 |
Our way cool color wheel. No, it doesn't tell time. It only tells color :)
|
Students created a self-portrait using color and facial expressions to show emotion. We studied many artist's portraits, from Picasso and Van Gogh to contemporary artists, like Francoise Nielly and Pascal Vilcollet. Students used oil pastels and learned how to add shading and highlights through layers and blending.
 |
| Self Portraits in oil pastel, working in layers |
 |
| Self Portrait using color and facial expression to show emotion, 3rd grade. |
 |
| First attempt at shading! Check out that proud girl! |
Close up on some cool details:
 |
| detail, 3rd grade |
 |
| detail, 3rd grade |
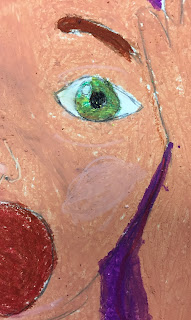 |
| detail, 3rd grade |
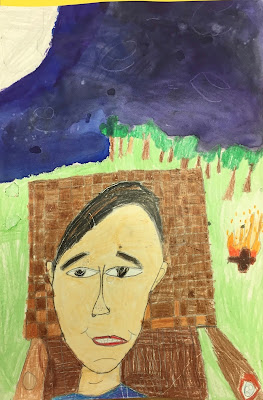
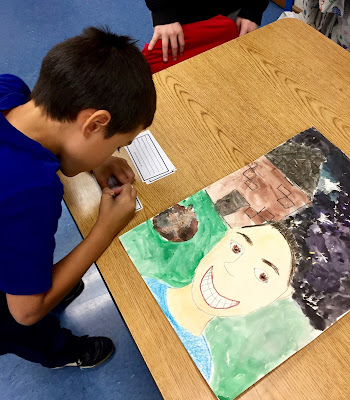
2nd Grade: Nighttime Selfies, Coiled Ceramic Pots
Second graders also learned about how to create a selfie using
proper proportion. However, they had to brainstorm creating a portrait
at night. Where are they, inside or outside? What are they doing? How do they feel: excited, sleepy, scared...?
Here's the big question (science integration!): if it's dark, how are we seeing their face? What is the light source? That lead to some fun and creative brainstorming!
These portraits were created with
crayon resist using watercolor. They learned the wet-on-wet technique and how to add salt for a starry sky effect.
 |
| Nighttime Selfie, 2nd grade |
 |
| Nighttime Selfie, 2nd grade |
 |
Adding the last touch--his label with his name, grade, and title
|
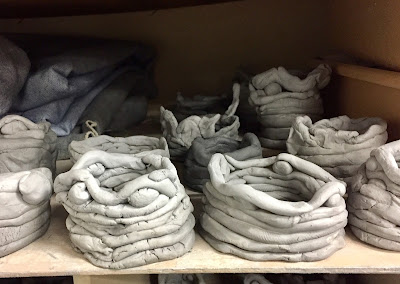
2 grade: Ceramic Coiled Pots
Students studied the pottery of Native American artists and learned about the physical change of clay to ceramic (Science integration!)
 |
| Waiting for our new kiln! |
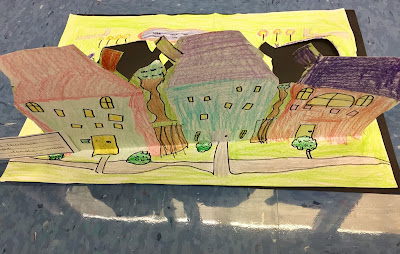
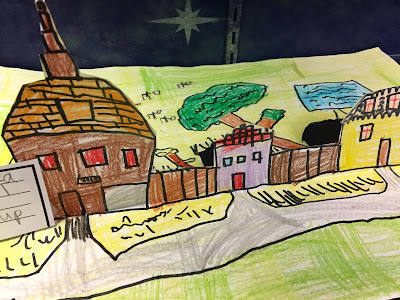
1st Grade: 3D Neighborhoods Pop-ups, Glue Batik.
Batik is the art form of creating cloth using resist. Traditionally, artists use hot melted wax and fabric dye. Obviously, we cannot do this with 1st graders, so our substitution is washable glue and acrylic paint.
Students created animal drawings with a focus on
lines, as the more lines drawn with glue, the better. Once the glue was dry, students painted with
acrylic paint, mixing their own secondary colors and tints. I prefer using acrylic paints with elementary students, and I teach them how to use it correctly so we rarely have accidents.
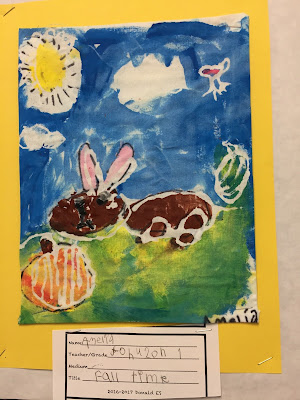 |
| "Fall Time", glue batik, 1st grade |
 |
| "Fox Art", glue batik, 1st grade |
1st grade: 3D Neighborhood Pop-ups: This is an oldie but a goodie! Students learn about their community during the first nine weeks of school. We look at our neighborhood courtesy of Google Earth and talk about all the parts we see.
Our focus is on drawing details and observation. Once the drawing was completed, the students cut the middle and top only and attached it to black paper for the shadow.
 |
| 3D pop up, 1st grade |
 |
| Check out the pool in the backyard and the 3D sidewalks! |
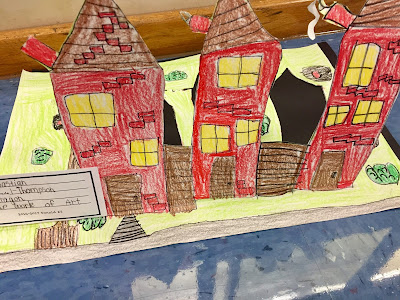 |
| We used fences to attach the buildings, allowing for easier cutting and standing. 1st grade |
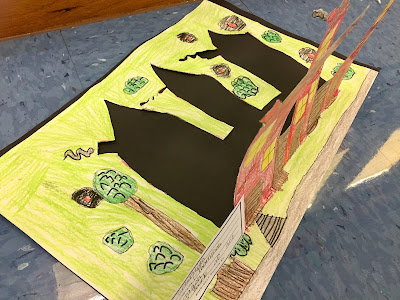 |
| Side view. |
Kindergarten: Paint, paint and more paint.
Kindergartners work fast, so I like to build multiple layers into the project. Books, videos, anything that helps make the project more relevant and engaging. Painting is a valuable and exciting art form and the kids love it!
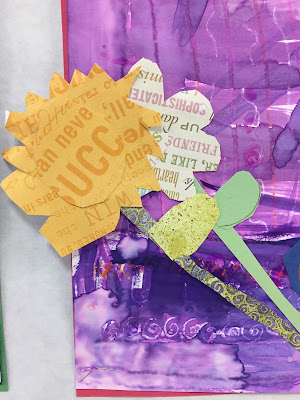
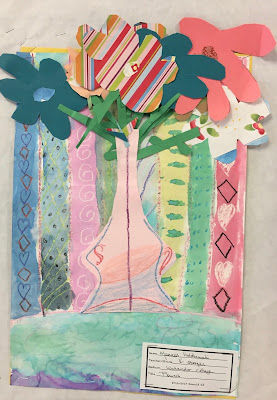
Flower Still-life Collage: students studied various flower still lifes created by artists from the Renaissance and Post Impressionism time periods. We compared and contrasted the works of art to help build observational skills.
Students created a
patterned background using crayon resist. Once dry, they observed fake flowers and drew them using shapes. These organic drawings were then
cut out, and this took a number of rotations. As I said above, cutting simple geometric shapes was easy for this group of kindergartners, but complex, organic shapes were a struggle. So we practiced.
Once these flowers...and bugs...were cut out, we learned the
proper technique for gluing and overlapping without drips and wasted glue. That also takes practice.
 |
| Detail of Flower Collage, kindergarten |
 |
| Flower Collage, kinder |
 |
Love using up donated scrapbook paper!
|
Fall Leaves: Warm and cool colors, watercolor.
Kindergarten then moved onto drawing fall leaves from observation. We looked for geometric and organic shapes to help us draw. Then we learned about warm and cool colors!
Warm colors--yellow, orange, red---are cozy. They appear to come forward in a painting.
Cool colors--blue, green, purple---are tranquil. They appear to recede in a painting. The correct use of these colors can help create the optical illusions we need for 3D art.
Students painted the leaves in warm fall colors, and once dry, they added a background in cool colors. They could use white crayons to create leaf veins, wind or water lines.
 |
| Kindergarten Fall Leaves, watercolor |
Fall Trees, acrylic painting with warm colors and white
After the leaves, we moved onto creating a silhouette painting using a warm color background. This time, we used acrylic paint and I gave them white to create tints. They mixed their own colors and experimented. Students are learning how to mix colors, hold a brush correctly and how to apply paint to paper. We used cheapo construction paper. I don't paint with tempera, I never have. I don't know why. I train the kids on how to paint and have very few accidents. Having Art Helpers assist is a great help.
 |
| I made pink! |
 |
| I made orange! |
Once the background dried, we painted a
horizon line and used a variety of lines to create trees.
 |
| Yummy Fall Sunset acrylic painting, kindergarten |
And now, The Extras! Teaching is not just 8-4. It is all the time. Here are some of the other things I have done over the past few weeks, usually during my planning time, or after school:
Paint and Brush Gang, my after-school club, is creating sewn plushies. They are learning how to thread needles, make hand knots, sew buttons and sew a complete stuffed creation. This is a HIT.
Community Art Show: we have a revolving art show at our local Point bank. Here is the Donald ES Art Show, up for a month.
5th grade Holiday Program: every year our amazing music teacher, Olivia Norine, directs a 5th grade Holiday program. This year was, "Holiday Road Trip", complete with singing, dancing and a bus driving Santa. The 5th graders rehearse during Specials for a few weeks, and I am the "Set Designer" and "Santa's Dresser", which means shenanigans backstage.
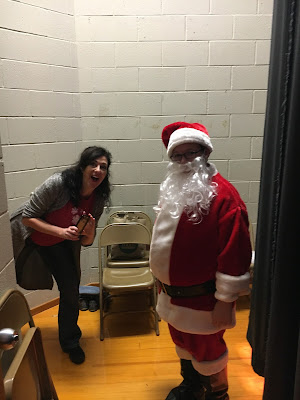 |
| Dressing Santa |
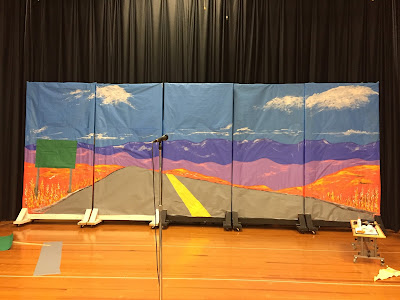 |
| Holiday road trip set in progress--kraft paper and paint. |
Teaching my peers. I had the opportunity to lead a quick painting class for our elementary guidance counselors for their December meeting. With only an hour, I did a quick intro/review of the color wheel and some painting tips, then they created a basic heart painting. They had so much fun! It was a great way for them to relax and connect with their friends. This was a great example of process over product, as most people were more excited about the experimentation and play, rather than a finished masterpiece. Some people did walk out with a gorgeous finished product, but many left knowing that they needed to keep working. I also brought a variety of collage papers that they could attach and paint into their canvas, so that added a layer of texture and variety. An hour is a short time for a painting, and they did a great job!
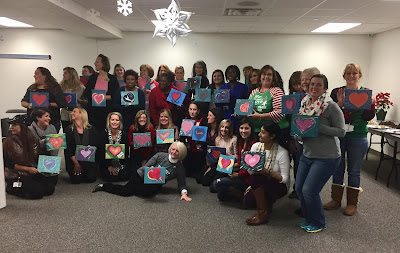 |
| Lewisville ISD guidance counselors with their finished paintings. |
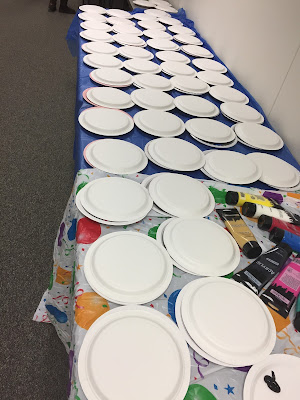 |
42 plates of paint ready to go!
|
Private lessons: I teach private lessons and they are so much fun! I love getting to know the kids on a different level and they love coming to my house. We get to do more in-depth art-making and things we cannot do with large groups. Very rewarding.
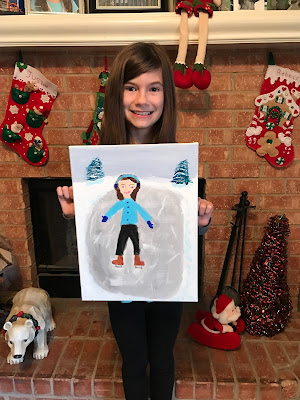 |
| Marissa with her ice skating portrait. |
So there you go, a month and a half in the life of an average elementary art teacher. I hope this has enlightened and delighted. If not, just check out Marissa's smile again :) Art makes us happy!


 I teach about 640 children a week and most of my class sizes are at 28. They come to art once or twice a week. Factor in assemblies and programs, fire drills, student absences, etc...during a 9 week period, I might see the kids 8-10 times. If I'm lucky.


No comments:
Post a Comment