About this Site and Me

My photo
Flower Mound, TX, United States
Hi, I am an artist, wife, mom, gamer and the Elementary Art Educator at Donald Elementary, a sweet and wonderful school in Flower Mound, TX (outside of Dallas). This is a great place to see how we are integrating studio habits with technology and interdisciplinary connections. I also love to share my "wisdom" (Re: Experiences. From mistakes.) about teaching Elementary Art. I love what I do, and I've been doing it for a long time. Creating and teaching Art is what I live for. Enjoy.
Showing posts with label self portraits. Show all posts

Saturday, May 24, 2014

Updated! 5th grade Ceramic Selfies

These awesome Ceramic Selfies (see previous post: here) were fired and kids painted them with acrylic paint (I caved and bought the cheap bottles at Walmart and Michaels for bright, bold colors). 

Fifth graders are answering the question: End of an era. How do you feel?

Here the slabs are, ready to dry and be fired!
After, the kids painted in the lines with black acrylic and allowed it to dry.


I was so impressed how the kids picked their colors. Most of the darker colors were not selected. Even if students portrayed themselves as nervous or scared, the colors they chose did not reflect those emotions. These kids are ready and exciting for Middle School!

When they finished, they used their original self portrait and this painted version as a digital portfolio entry, answering the question: End of an Era, how do you feel? I cannot wait to read their responses!

Wednesday, April 16, 2014

Life in the Donald Art room during a 3 day week. With a lunar eclipse. And a holiday.

WHOOO Hoooooo what a fast, noisy week! Only three days with the kids,but we got so many wonderful things started. 


First up: 5th grade, Altered Books
This is a popular lesson! We compared traditional books vs e-books, tech vs non-tech. Holy cow. What an amazing discussion between the pros and cons of  this type of technology. These kids are so insightful. They were also excited to "upcycle" their discarded library book. Our librarian, Kathy Hoffman, came in and talked to the kids about how she goes about "weeding" books (and that school library books are bought with tax dollars, so they cannot be sold or donated) This is a great sculpture project and really allows the students to explore their creative problem solving. 

Yes. RosaLynn loves this picture. She ok'ed it.
Fold it, roll it, curl it, rip it, glue it, BOP IT!
   
  This is only the second time we have worked on these, so they are just at the beginning stages. I love when they start adding their own personality to these sculptures!


OK. This is something I have not done in about fifteen years. I am teaching these guys how to cut with a blade. Artists use blades all the time, and I can't remember a time in school when I didn't have a lino or exacto blade. Times are different, but these kids really wanted to carve out the center of their book. They have really risen to this challenge! (Oh. And I stood with them the entire time.)
Wait. Collin did get an injury: a paper cut. 


Loving the penguins pop-up!


^.^


3rd Grade: Digital Selfies
 I have continued my fascination between the stylistic differences between "Self Portraits" and "Selfies" with our third grade (see: last post)

The kids were able to explain a "self portrait" and then I had them act it out. Yearbook smiles and Mona Lisa poses. Again.
Then we explored "selfies" and their personalities popped out. It is so cool!

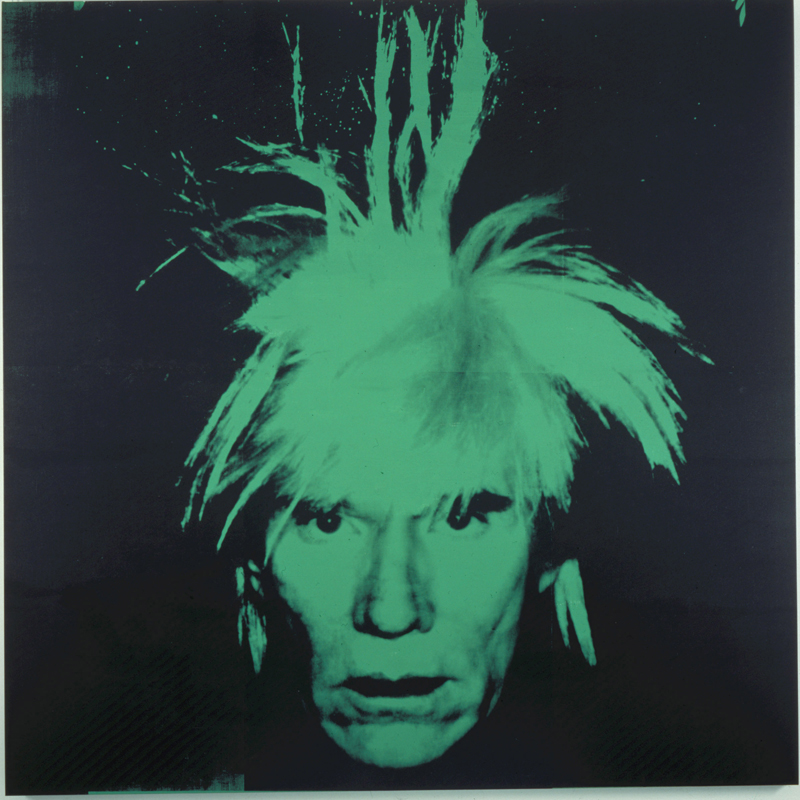
The kids have wanted to learn photography tips and tricks, so I decided to focus on pose and position (composition), background and the use of edits and filters (no more than two filters!). We spent some time looking at Andy Warhol's self portraits and talking about what he was trying to share through his art.
They loved talking about his hair ^.^

I showed them how to best take pictures using their iPads, using Snapseed or a similar editing app. The kids need to create two distinct selfies demonstrating the answer to this question: Who Am I? They are third graders, so I am curious how they will do:

This makes my heart happy. I think this might be the best picture ever.

Photographic editing features and filters have transformed photography. Use them wisely!


And then, 4th grade: Medieval Rose Windows (radial symmetry)

This is a perfect example of how Art Ed has changed over the years. We used to make these really big--the size of paper plates. But we really cannot work that big anymore for a variety of reasons: budget cuts, assessments and plain old time. One way to deal with this is to change the scale. It's ok. Same project, just smaller. The kids LOVED making the miniature Rose windows. They felt productive and efficient. And who doesn't like that?

Our previous weaving project took many weeks, so it is good to balance with shorter lessons.
Sketch on manila, tape on left over laminating film, fill in with Sharpie. 


Happy Easter and have a great weekend!


Thursday, January 16, 2014

Funniest assessment ever.


2nd grade: "Selfies"

Guiding Ideas: Self portraits can show emotion, photography and photo editing with the iPad, introducing layering and mixing using color pencils. 

Student Assessment: on the back of your work, answer these two questions:

What is your favorite part of this work of art?
Do you want this displayed in the hallway?


CRACKING ME UP.


Monday, November 14, 2011

Pre-Assessment:  Kindergarten and 1st Grade
"Me and My Shadow with a Duck", by Austin, 1st grade
"Me and My Shadow", by Jared, 1st Grade


These adorable works of art are Self Portraits showing Movement by some of our 1st graders. This is the first project we do in August-September. It is actually a Pre-Assessment for me. I do the same project with Kindergarten, without the movement and shadow. These are so fun and precious!
This is a great project to start the year, as it integrates perfectly with what they are learning in Social Studies the first few weeks of school: "All About Me".  This is an important introduction/review of Self Portraits, and allows me to assess fine motor skills with drawing, coloring, gluing and cutting with scissors. Here's what I do:

1.       While they are drawing their self portrait, I am monitoring fine motor skills and self awareness. I know that if I see a lot of "potato people" I may have to scale back and introduce some basics. If I see more details, then I can introduce more complex techniques and ideas. How they hold the pencil and crayon is noted as well, as this may mean more lessons that deal with fine motor skills.
 "Self Portrait", by Ryder, Kindergarten
2.       Once the drawing in completed, then I spend some time on basic Color Theory: introducing Color Families--
a.       Red and Yellow are the parents; all the oranges are their kids. These colors mix well together.
b.      Yellow and Blue are the parents; all the greens are their kids.
c.       Red and Blue are the parents; all the purples are their kids. You get the idea!

3.       I teach them how to outline and crosshatch whenever they color. No more scribbling! This is something that I repeat many times throughout the years...

4.       I encourage them to mix family colors and use at least 5 different colors. They must color the skin and hair. I am looking for clean work here (craftsmanship). I am also looking for attention to details: did they color in their eye color? How about the patterns on their clothes? Shoes, etc...

 
5.       After that, we need to cut these portraits out! This is when the kids look at me bug-eyed. You know they are worried about chopping off a leg or those tiny fingers. So I teach them to draw a tight bubble around their portrait. This is a great tool and can be used forever! They cut on the bubble line; it's so much easier and no chopped off "body parts"!
"Me and My Shadow Dancing", by Megan, 1st Grade
      6.   As they are cutting, I am really monitoring their cutting skills: how they hold the scissors, how they turn the paper, how they tackle those hard corners. I've actually had kids tell me they aren't allowed to use scissors! So here's where I have to check and maybe change some lessons...snowflakes anyone? 


7.   After the cutting is finished, we glue our portraits onto a background paper. I teach them how to apply glue around the edges: using glue bottles, we keep the nib on the paper and lightly trace the edge. This way, there should be no major leakage and no edges popping off, my pet-peeves. Keeping the glue side up, we lay the background paper on top, rub gently and flip the paper over. Ta-Da! Perfectly glued down and no drips and smears.
8.     Priceless! I especially love to compare these to art they do at the end of the year.
"Self Portrait", Sarah, Kindergarten